How to Apply Anti-Seize to Ball Nose Insert Screws
- Anti-seize must be applied before using tool for first time.
- Remove screw from cutter body.
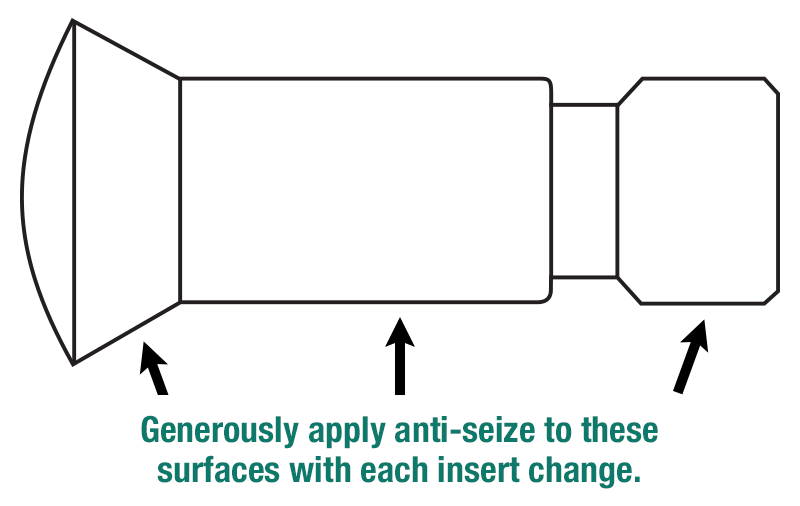
- Generously apply anti-seize to entire length of screw body, not to just the threads (see diagram).
- Clean out insert pocket before assembly of insert/screw combination.
- Place insert into cutter-body pocket.
- Place screw with applied anti-seize into position in cutter body.
- While gently pushing on the end of the TORX® screwdriver/wrench, begin tightening the screw (may turn with slight resistance in order to pull insert tight into the pocket).
- Tighten screw to snug fit, taking care not to overtighten. Follow torque specifications shown on page 12 of our Ball Nose catalog.
- Repeat steps 2-8 for each insert change.
- Replace screw with each new box of inserts to assure maximum performance.